CloudStackを使ってみよう[1]
この記事は1年以上前に投稿されました。情報が古い可能性がありますので、ご注意ください。
CloudStack 3.0.3のインストール
本項ではCloudStack 3.0.3をハイパーバイザとしてKVMを選択し、2台のCentOS 6.2 (x86_64)上にインストールした際の手順を記載します。インストールドキュメントは Installing CloudStack にある
- Quick Install Guide (English) - v3.0.0 - 3.0.2
- Quick Install Guide (Japanese) - v3.0.0 only
を参照してください。なお、日本語ドキュメントは英語ドキュメントに比べて版が古いため、基本的に英語ドキュメントに従ってインストールを進めてください。
ハードウェアの準備
本項では2台のマシンでCloudStack環境を構築します。今回は以下の構成のマシンを2台準備しました。
- CPU
- Intel Core i5-3570K
- MEM
- DDR3 SDRAM PC3-12800 4GB x4
- HDD
- 500GB 7200rpm
仮想化支援技術であるIntel VTを備えたCPU、メモリは合計して16GBと多めに搭載します。HDDは本格的にCloudStackを運用するのであれば、より多くの領域が必要となります。
OSのインストール
CentOS 6.2 (x86_64)をMinimal (最小構成)でインストールします。詳細な手順は省略します。以降、1台目を「管理サーバ」、2台目を「ホスト」と呼称します。ホストはコンピューティングノードとも呼ばれます。また、以下のように設定を行います。
| サーバ | IPアドレス | ホスト名 | rootパスワード |
|---|---|---|---|
| 管理サーバ | 192.168.24.110 | cs-manager.example.jp | csmanager1234 |
| ホスト | 192.168.24.111 | cs-host.example.jp | cshost1234 |
管理サーバのインストール
管理サーバには、CloudStack管理サーバ、MySQLデータベース、NFSストレージとしての役割を持たせます。
まず、ホスト名を設定します。
[root@cs-manager ~]# cp -a /etc/hosts /etc/hosts.2012-0620
[root@cs-manager ~]# vi /etc/hosts
[root@cs-manager ~]# diff -u /etc/hosts.2012-0620 /etc/hosts
--- /etc/hosts.2012-0620        2010-01-12 22:28:22.000000000 +0900
+++ /etc/hosts  2012-06-20 23:35:44.983518114 +0900
@@ -1,2 +1,7 @@
 127.0.0.1   localhost localhost.localdomain localhost4 localhost4.localdomain4
 ::1         localhost localhost.localdomain localhost6 localhost6.localdomain6
+
+# 2012/06/20
+192.168.24.110 cs-manager.example.jp cs-manager
+192.168.24.111 cs-host.example.jp    cs-host
+#
[root@cs-manager ~]#
FQDNを確認します。ホスト名はFQDNでなければいけないので、忘れず確認してください。
[root@cs-manager ~]# hostname --fqdn
cs-manager.example.jp
[root@cs-manager ~]# hostname
cs-manager.example.jp
[root@cs-manager ~]#
SELinuxを無効にします。
[root@cs-manager ~]# cp -a /etc/selinux/config /etc/selinux/config.2012-0620
[root@cs-manager ~]# vi /etc/selinux/config
[root@cs-manager ~]# diff -u /etc/selinux/config.2012-0620 /etc/selinux/config
--- /etc/selinux/config.2012-0620       2012-06-20 09:06:02.007403145 +0900
+++ /etc/selinux/config 2012-06-20 23:06:10.369516061 +0900
@@ -4,7 +4,10 @@
 #     enforcing - SELinux security policy is enforced.
 #     permissive - SELinux prints warnings instead of enforcing.
 #     disabled - No SELinux policy is loaded.
-SELINUX=enforcing
+# 2012/06/20
+#SELINUX=enforcing
+SELINUX=permissive
+#
 # SELINUXTYPE= can take one of these two values:
 #     targeted - Targeted processes are protected,
 #     mls - Multi Level Security protection.
[root@cs-manager ~]#
[root@cs-manager ~]# setenforce permissive
[root@cs-manager ~]#
CloudStack管理サーバのインストールを行います。
質問には「M」とタイプします。途中ではyumを利用してパッケージのインストールが行われます。
[root@cs-manager ~]# tar xfz CloudStack-3.0.3-1-rhel6.2.tar.gz
[root@cs-manager ~]# cd CloudStack-3.0.3-1-rhel6.2
[root@cs-manager CloudStack-3.0.3-1-rhel6.2]# ./install.sh
Setting up the temporary repository...
Cleaning Yum cache...
Loaded plugins: fastestmirror
Cleaning repos: base cloud-temp extras updates
6 metadata files removed
Welcome to the CloudStack Installer.  What would you like to do?

        NOTE:   For installing KVM agent, please setup EPEL yum repo first;
                For installing CloudStack on RHEL6.x, please setup distribution yum repo either from ISO or from your registeration account.

    M) Install the Management Server
    A) Install the Agent
    B) Install BareMetal Agent
    S) Install the Usage Monitor
    D) Install the database server (from distribution's repo)
    L) Install the MySQL 5.1.58 (only for CentOS5.x, Rhel6.x naturally has higher version MySql)
    Q) Quit
 > M ←★
Installing the Management Server...
        :
        :
        :
Total download size: 248 M
Installed size: 586 M
Is this ok [y/N]: y ←★
        :
        :
        :
Complete!
Done
[root@cs-manager CloudStack-3.0.3-1-rhel6.2]#
必須サービスを有効にし、起動します。
[root@cs-manager ~]# chkconfig rpcbind on
[root@cs-manager ~]# chkconfig nfs on
[root@cs-manager ~]#

[root@cs-manager ~]# service rpcbind start
rpcbind を起動中:                                          [  OK  ]
[root@cs-manager ~]# service nfs start
NFS サービスを起動中:                                      [  OK  ]
NFS mountd を起動中:                                       [  OK  ]
RPC idmapd を起動中:                                       [  OK  ]
NFS デーモンを起動中:                                      [  OK  ]
[root@cs-manager ~]#
MySQLのインストールとセットアップを行います。
質問には「D」とタイプします。途中ではyumを利用してパッケージのインストールが行われます。
[root@cs-manager CloudStack-3.0.3-1-rhel6.2]# ./install.sh
Setting up the temporary repository...
Cleaning Yum cache...
Loaded plugins: fastestmirror
Cleaning repos: base cloud-temp extras updates
7 metadata files removed
Welcome to the CloudStack Installer.  What would you like to do?

        NOTE:   For installing KVM agent, please setup EPEL yum repo first;
                For installing CloudStack on RHEL6.x, please setup distribution yum repo either from ISO or from your registeration account.

    A) Install the Agent
    B) Install BareMetal Agent
    S) Install the Usage Monitor
    D) Install the database server (from distribution's repo)
    U) Upgrade the CloudStack packages installed on this computer
    R) Stop any running CloudStack services and remove the CloudStack packages from this computer
    L) Install the MySQL 5.1.58 (only for CentOS5.x, Rhel6.x naturally has higher version MySql)
    Q) Quit
 > D ←★
Installing the MySQL server...
        :
        :
        :
Total download size: 9.8 M
Installed size: 28 M
Is this ok [y/N]: y ←★
        :
        :
        :
mysqld を起動中:                                           [  OK  ]
Done
[root@cs-manager CloudStack-3.0.3-1-rhel6.2]#
/etc/my.cnfを設定します。
[root@cs-manager ~]# cp -a /etc/my.cnf /etc/my.cnf.2012-0620
[root@cs-manager ~]# vi /etc/my.cnf
[root@cs-manager ~]# diff -u /etc/my.cnf.2012-0620 /etc/my.cnf
--- /etc/my.cnf.2012-0620       2012-02-09 06:39:38.000000000 +0900
+++ /etc/my.cnf 2012-06-20 23:27:07.335518049 +0900
@@ -4,6 +4,13 @@
 user=mysql
 # Disabling symbolic-links is recommended to prevent assorted security risks
 symbolic-links=0
+# 2012/06/20 add
+innodb_rollback_on_timeout=1
+innodb_lock_wait_timeout=600
+max_connections=350
+log-bin=mysql-bin
+binlog-format = 'ROW'
+#

 [mysqld_safe]
 log-error=/var/log/mysqld.log
[root@cs-manager ~]#
MySQLを再起動し、設定を反映します。
[root@cs-manager ~]# service mysqld restart
mysqld を停止中:                                           [  OK  ]
mysqld を起動中:                                           [  OK  ]
[root@cs-manager ~]#
MySQLのrootパスワードを設定します。
[root@cs-manager ~]# mysql -u root
        :
mysql> SET PASSWORD = PASSWORD('myroot1234');
Query OK, 0 rows affected (0.00 sec)

mysql> exit
Bye
[root@cs-manager ~]#
CloudStack用にMySQLを設定します。これには少し時間がかかります。
MySQLユーザ「cloud」のパスワードを「myuser1234」とします。また、実行にはMySQLのrootユーザを用います。
[root@cs-manager ~]# cloud-setup-databases cloud:myuser1234@localhost --deploy-as=root:myroot1234
Mysql user name:cloud                                                           [ OK ]
Mysql user password:myuser1234                                                  [ OK ]
Mysql server ip:localhost                                                       [ OK ]
Mysql server port:3306                                                          [ OK ]
Mysql root user name:root                                                       [ OK ]
Mysql root user password:myroot1234                                             [ OK ]
Checking Cloud database files ...                                               [ OK ]
Checking local machine hostname ...                                             [ OK ]
Checking SELinux setup ...                                                      [ OK ]
Detected local IP address as 192.168.24.110, will use as cluster management server node IP[ OK ]
Preparing /etc/cloud/management/db.properties                                   [ OK ]
Applying /usr/share/cloud/setup/create-database.sql                             [ OK ]
Applying /usr/share/cloud/setup/create-schema.sql                               [ OK ]
Applying /usr/share/cloud/setup/create-database-premium.sql                     [ OK ]
Applying /usr/share/cloud/setup/create-schema-premium.sql                       [ OK ]
Applying /usr/share/cloud/setup/server-setup.sql                                [ OK ]
Applying /usr/share/cloud/setup/templates.sql                                   [ OK ]
Applying /usr/share/cloud/setup/create-index-fk.sql                             [ OK ]
Applying /usr/share/cloud/setup/bridge/db/cloudbridge_db.sql                    [ OK ]
Applying /usr/share/cloud/setup/bridge/db/cloudbridge_schema.sql                [ OK ]
Applying /usr/share/cloud/setup/bridge/db/cloudbridge_multipart.sql             [ OK ]
Applying /usr/share/cloud/setup/bridge/db/cloudbridge_index.sql                 [ OK ]
Applying /usr/share/cloud/setup/bridge/db/cloudbridge_multipart_alter.sql       [ OK ]
Applying /usr/share/cloud/setup/bridge/db/cloudbridge_bucketpolicy.sql          [ OK ]
Applying /usr/share/cloud/setup/bridge/db/cloudbridge_policy_alter.sql          [ OK ]
Applying /usr/share/cloud/setup/bridge/db/cloudbridge_offering.sql              [ OK ]
Applying /usr/share/cloud/setup/bridge/db/cloudbridge_offering_alter.sql        [ OK ]
Processing encryption ...                                                       [ OK ]
Finalizing setup ...                                                            [ OK ]

CloudStack has successfully initialized database, you can check your database configuration in /etc/cloud/management/db.properties

[root@cs-manager ~]#
管理サーバの構成と起動を行います。
[root@cs-manager ~]# cloud-setup-management
Starting to configure CloudStack Management Server:
Configure sudoers ...         [OK]
Configure Firewall ...        [OK]
Configure CloudStack Management Server ...[OK]
CloudStack Management Server setup is Done!
[root@cs-manager ~]#
ストレージ用のNFS共有を準備します。
[root@cs-manager ~]# mkdir -p /export/primary
[root@cs-manager ~]# mkdir -p /export/secondary
[root@cs-manager ~]#
[root@cs-manager ~]# cp -a /etc/exports /etc/exports.2012-0620
[root@cs-manager ~]# vi /etc/exports
[root@cs-manager ~]# diff -u /etc/exports.2012-0620 /etc/exports
--- /etc/exports.2012-0620      2010-01-12 22:28:22.000000000 +0900
+++ /etc/exports        2012-06-20 23:45:34.351518204 +0900
@@ -0,0 +1,3 @@
+# 2012/06/20 add
+/export *(rw,async,no_root_squash)
+#
[root@cs-manager ~]#
[root@cs-manager ~]# exportfs -a
[root@cs-manager ~]#
NFSの設定を変更します。主に利用するポートの固定です。
[root@cs-manager ~]# cp -a /etc/sysconfig/nfs /etc/sysconfig/nfs.2012-0620
[root@cs-manager ~]# vi /etc/sysconfig/nfs
[root@cs-manager ~]# diff -u /etc/sysconfig/nfs.2012-0620 /etc/sysconfig/nfs
--- /etc/sysconfig/nfs.2012-0620        2012-05-21 17:38:53.000000000 +0900
+++ /etc/sysconfig/nfs  2012-06-20 23:49:02.344518134 +0900
@@ -9,7 +9,9 @@
 # Path to remote quota server. See rquotad(8)
 #RQUOTAD="/usr/sbin/rpc.rquotad"
 # Port rquotad should listen on.
-#RQUOTAD_PORT=875
+# 2012/06/20 start
+RQUOTAD_PORT=875
+#
 # Optinal options passed to rquotad
 #RPCRQUOTADOPTS=""
 #
@@ -17,9 +19,13 @@
 # Optional arguments passed to in-kernel lockd
 #LOCKDARG=
 # TCP port rpc.lockd should listen on.
-#LOCKD_TCPPORT=32803
+# 2012/06/20 start
+LOCKD_TCPPORT=32803
+#
 # UDP port rpc.lockd should listen on.
-#LOCKD_UDPPORT=32769
+# 2012/06/20 start
+LOCKD_UDPPORT=32769
+#
 #
 #
 # Optional arguments passed to rpc.nfsd. See rpc.nfsd(8)
@@ -40,16 +46,22 @@
 # Optional arguments passed to rpc.mountd. See rpc.mountd(8)
 #RPCMOUNTDOPTS=""
 # Port rpc.mountd should listen on.
-#MOUNTD_PORT=892
+# 2012/06/20 start
+MOUNTD_PORT=892
+#
 #
 #
 # Optional arguments passed to rpc.statd. See rpc.statd(8)
 #STATDARG=""
 # Port rpc.statd should listen on.
-#STATD_PORT=662
+# 2012/06/20 start
+STATD_PORT=662
+#
 # Outgoing port statd should used. The default is port
 # is random
-#STATD_OUTGOING_PORT=2020
+# 2012/06/20 start
+STATD_OUTGOING_PORT=2020
+#
 # Specify callout program
 #STATD_HA_CALLOUT="/usr/local/bin/foo"
 #
[root@cs-manager ~]#
iptablesの設定を変更します。NFS用に固定したポートを許可します。
[root@cs-manager ~]# cp -a /etc/sysconfig/iptables /etc/sysconfig/iptables.2012-0620
[root@cs-manager ~]# vi /etc/sysconfig/iptables
[root@cs-manager ~]# diff -u /etc/sysconfig/iptables.2012-0620 /etc/sysconfig/iptables
--- /etc/sysconfig/iptables.2012-0620   2012-06-20 23:41:04.948514618 +0900
+++ /etc/sysconfig/iptables     2012-06-20 23:54:25.869518127 +0900
@@ -3,6 +3,17 @@
 :INPUT ACCEPT [0:0]
 :FORWARD ACCEPT [0:0]
 :OUTPUT ACCEPT [0:0]
+-A INPUT -m state --state NEW -p udp --dport 111 -j ACCEPT
+-A INPUT -m state --state NEW -p tcp --dport 111 -j ACCEPT
+-A INPUT -m state --state NEW -p tcp --dport 2049 -j ACCEPT
+-A INPUT -m state --state NEW -p tcp --dport 32803 -j ACCEPT
+-A INPUT -m state --state NEW -p udp --dport 32769 -j ACCEPT
+-A INPUT -m state --state NEW -p tcp --dport 892 -j ACCEPT
+-A INPUT -m state --state NEW -p udp --dport 892 -j ACCEPT
+-A INPUT -m state --state NEW -p tcp --dport 875 -j ACCEPT
+-A INPUT -m state --state NEW -p udp --dport 875 -j ACCEPT
+-A INPUT -m state --state NEW -p tcp --dport 662 -j ACCEPT
+-A INPUT -m state --state NEW -p udp --dport 662 -j ACCEPT
 -A INPUT -p tcp -m tcp --dport 9090 -j ACCEPT
 -A INPUT -p tcp -m tcp --dport 8250 -j ACCEPT
 -A INPUT -p tcp -m tcp --dport 8080 -j ACCEPT
[root@cs-manager ~]#
NFSv4を設定します。設定したFQDNのドメイン部分を記載します。
[root@cs-manager ~]# cp -a /etc/idmapd.conf /etc/idmapd.conf.2012-0620
[root@cs-manager ~]# vi /etc/idmapd.conf
[root@cs-manager ~]# diff -u /etc/idmapd.conf.2012-0620 /etc/idmapd.conf
--- /etc/idmapd.conf.2012-0620  2011-12-08 05:02:21.000000000 +0900
+++ /etc/idmapd.conf    2012-06-20 23:55:59.398518190 +0900
@@ -3,6 +3,9 @@
 # The following should be set to the local NFSv4 domain name
 # The default is the host's DNS domain name.
 #Domain = local.domain.edu
+# 2012/06/20 add
+Domain = example.jp
+#

 # The following is a comma-separated list of Kerberos realm
 # names that should be considered to be equivalent to the
[root@cs-manager ~]#
ここで一旦、マシンを再起動します。
マシンが起動してきたら、システムVMのテンプレートを準備します。
ハイパーバイザにはKVMを使うので、KVM用のテンプレートを使用します。XenServer用とファイル名がまぎらわしいので注意してください。
[root@cs-manager ~]# /usr/lib64/cloud/agent/scripts/storage/secondary/cloud-install-sys-tmplt -m /export/secondary -u http://download.cloud.com/templates/acton/acton-systemvm-02062012.qcow2.bz2 -h kvm -F
	:
	:
	:
Uncompressing to /usr/lib64/cloud/agent/scripts/storage/secondary/af03ad24-b815-43f2-9369-ca6ebb79a87b.qcow2.tmp (type bz2)...could take a long time
Moving to /export/secondary/template/tmpl/1/3///af03ad24-b815-43f2-9369-ca6ebb79a87b.qcow2...could take a while
Successfully installed system VM template  to /export/secondary/template/tmpl/1/3/
[root@cs-manager ~]#
以上で管理サーバのインストールは完了です。
ホストのインストール
まず、ホスト名を設定します。
[root@cs-host ~]# cp -a /etc/hosts /etc/hosts.2012-0620
[root@cs-host ~]# vi /etc/hosts
[root@cs-host ~]# diff -u /etc/hosts.2012-0620 /etc/hosts
--- /etc/hosts.2012-0620        2010-01-12 22:28:22.000000000 +0900
+++ /etc/hosts  2012-06-21 01:12:21.379194398 +0900
@@ -1,2 +1,7 @@
 127.0.0.1   localhost localhost.localdomain localhost4 localhost4.localdomain4
 ::1         localhost localhost.localdomain localhost6 localhost6.localdomain6
+
+# 2012/06/20
+192.168.24.110 cs-manager.example.jp cs-manager
+192.168.24.111 cs-host.example.jp    cs-host
+#
[root@cs-host ~]#
FQDNを確認します。ホスト名はFQDNでなければいけないので、忘れず確認してください。
[root@cs-host ~]# hostname --fqdn
cs-host.example.jp
[root@cs-host ~]# hostname
cs-host.example.jp
[root@cs-host ~]#
qemuやkvmがインストールされていないことを確認します。CloudStackが提供しているパッケージをインストールするためです。
[root@cs-host ~]# rpm -qa | grep -i qemu
[root@cs-host ~]# rpm -qa | grep -i kvm
[root@cs-host ~]#
EPELレポジトリを設定します。
[root@cs-host ~]# rpm -Uvh http://ftp.riken.jp/Linux/fedora/epel/6/i386/epel-release-6-7.noarch.rpm
http://ftp.riken.jp/Linux/fedora/epel/6/i386/epel-release-6-7.noarch.rpm を取得中
警告: /var/tmp/rpm-tmp.yDqxXJ: ヘッダ V3 RSA/SHA256 Signature, key ID 0608b895: NOKEY
準備中...                ########################################### [100%]
   1:epel-release           ########################################### [100%]
[root@cs-host ~]#
CloudStackエージェントのインストールを行います。
質問には「A」とタイプします。途中ではyumを利用してパッケージのインストールが行われます。
[root@cs-host ~]# tar xfz CloudStack-3.0.3-1-rhel6.2.tar.gz
[root@cs-host ~]# cd CloudStack-3.0.3-1-rhel6.2
[root@cs-host CloudStack-3.0.3-1-rhel6.2]# ./install.sh
Setting up the temporary repository...
Cleaning Yum cache...
Loaded plugins: fastestmirror
Cleaning repos: base cloud-temp extras updates
6 metadata files removed
Welcome to the CloudStack Installer.  What would you like to do?

        NOTE:   For installing KVM agent, please setup EPEL yum repo first;
                For installing CloudStack on RHEL6.x, please setup distribution yum repo either from ISO or from your registeration account.

    M) Install the Management Server
    A) Install the Agent
    B) Install BareMetal Agent
    S) Install the Usage Monitor
    D) Install the database server (from distribution's repo)
    L) Install the MySQL 5.1.58 (only for CentOS5.x, Rhel6.x naturally has higher version MySql)
    Q) Quit
 > A ←★
Installing the Agent...
        :
        :
        :
Total download size: 131 M
Installed size: 317 M
Is this ok [y/N]: y ←★
        :
        :
        :
Agent installation is completed, please add the host from management server
Done
[root@cs-host CloudStack-3.0.3-1-rhel6.2]#
必須サービスを有効にし、起動します。
[root@cs-host ~]# chkconfig rpcbind on
[root@cs-host ~]# chkconfig nfs on
[root@cs-host ~]#

[root@cs-host ~]# service rpcbind start
rpcbind を起動中:                                          [  OK  ]
[root@cs-host ~]# service nfs start
NFS サービスを起動中:                                      [  OK  ]
NFS mountd を起動中:                                       [  OK  ]
RPC idmapd を起動中:                                       [  OK  ]
NFS デーモンを起動中:                                      [  OK  ]
[root@cs-host ~]#
VNC接続を許可します。
[root@cs-host ~]# cp -a /etc/libvirt/qemu.conf /etc/libvirt/qemu.conf.2012-0620
[root@cs-host ~]# vi /etc/libvirt/qemu.conf
[root@cs-host ~]# diff -u /etc/libvirt/qemu.conf.2012-0620 /etc/libvirt/qemu.conf
--- /etc/libvirt/qemu.conf.2012-0620    2012-06-13 18:39:07.000000000 +0900
+++ /etc/libvirt/qemu.conf      2012-06-21 01:23:16.165194390 +0900
@@ -9,7 +9,9 @@
 # NB, strong recommendation to enable TLS + x509 certificate
 # verification when allowing public access
 #
-# vnc_listen = "0.0.0.0"
+# 2012/06/20 start
+vnc_listen = "0.0.0.0"
+#

 # Enable this option to have VNC served over an automatically created
 # unix socket. This prevents unprivileged access from users on the
[root@cs-host ~]#
[root@cs-host ~]# /etc/init.d/libvirtd restart
libvirtd デーモンを停止中:                                 [  OK  ]
libvirtd デーモンを起動中:                                 [  OK  ]
[root@cs-host ~]#
NFSv4を設定します。設定したFQDNのドメイン部分を記載します。
[root@cs-host ~]# cp -a /etc/idmapd.conf /etc/idmapd.conf.2012-0620
[root@cs-host ~]# vi /etc/idmapd.conf
[root@cs-host ~]# diff -u /etc/idmapd.conf.2012-0620 /etc/idmapd.conf
--- /etc/idmapd.conf.2012-0620  2011-12-08 05:02:21.000000000 +0900
+++ /etc/idmapd.conf    2012-06-21 01:24:39.733194400 +0900
@@ -3,6 +3,9 @@
 # The following should be set to the local NFSv4 domain name
 # The default is the host's DNS domain name.
 #Domain = local.domain.edu
+# 2012/06/20 add
+Domain = example.jp
+#

 # The following is a comma-separated list of Kerberos realm
 # names that should be considered to be equivalent to the
[root@cs-host ~]#
NFS接続が可能か確認します。
[root@cs-host ~]# mkdir /primarymount
[root@cs-host ~]# mount -t nfs 192.168.24.110:/export/primary /primarymount
[root@cs-host ~]# mkdir /secondarymount
[root@cs-host ~]# mount -t nfs 192.168.24.110:/export/secondary /secondarymount
[root@cs-host ~]#
[root@cs-host ~]# mount -t nfs
192.168.24.110:/export/primary on /primarymount type nfs (rw,vers=4,addr=192.168.24.110,clientaddr=192.168.24.111)
192.168.24.110:/export/secondary on /secondarymount type nfs (rw,vers=4,addr=192.168.24.110,clientaddr=192.168.24.111)
[root@cs-host ~]#
[root@cs-host ~]# umount /primarymount
[root@cs-host ~]# umount /secondarymount
[root@cs-host ~]#
NTPを設定します。
[root@cs-host ~]# yum install ntp
        :
Total download size: 501 k
Installed size: 1.2 M
Is this ok [y/N]: y ←★
        :
Complete!
[root@cs-host ~]#
[root@cs-host ~]# chkconfig ntpd on
[root@cs-host ~]#

[root@cs-host ~]# service ntpd start
ntpd を起動中:                                             [  OK  ]
[root@cs-host ~]#
以上でホストのインストールは完了です。
CloudStackの初期セットアップ
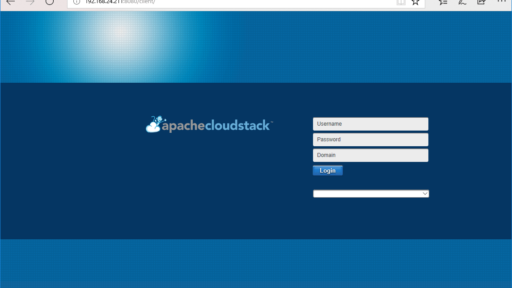
管理サーバ http://192.168.24.110:8080/client/ にアクセスし、UIが表示されることを確認します。初期はユーザ名「admin」、パスワード「password」でログインできます。
ガイドが開始され、ライセンス契約が表示されるので、読んで【同意する】ボタンを押します。次に【基本インストールを続行する】ボタンを押し、基本インストールを開始します。
ゾーンの追加を行います。ゾーンとはCloudStack内の最大の組織単位で、単一のデータセンターに相当します。
- 名前
- TestZone
- DNS1
- 192.168.24.1
- 内部DNS1
- 192.168.24.1
とします。もちろん、192.168.24.1ではDNSサーバが起動している必要があります。
ポッドの追加を行います。ポットとはCloudStack内の2番目に大きな組織単位で、単一のラックに相当します。
- 名前
- TestPod
- ゲートウェイ
- 192.168.24.1
- ネットマスク
- 255.255.255.0
- IPアドレスの範囲
- 192.168.24.120 - 192.168.24.139
とします。もちろん、192.168.24.1がゲートウェイである必要があります。ネットマスクなども環境に合わせてください。
ゲストネットワークの追加を行います。
- ゲートウェイ
- 192.168.24.1
- ネットマスク
- 255.255.255.0
- IPアドレスの範囲
- 192.168.24.160 - 192.168.24.179
クラスターの追加を行います。クラスターとはCloudStack内の3番目に大きな組織単位です。
- ハイパーバイザー
- KVM
- 名前
- TestCluster
ホスト(コンピューティングノード)の追加を行います。管理サーバからrootでリモートログンして設定を行うため、rootのパスワードを入力します。
- ホスト名
- 192.168.24.111
- ユーザー名
- root
- パスワード
- cshost1234
プライマリストレージの追加を行います。プライマリストレージとは、CloudStack上で動作する仮想サーバの仮想ディスクを保存するための領域です。
- 名前
- TestStorage
- プロトコル
- NFS
- サーバー
- 192.168.24.110
- パス
- /export/primary
セカンダリストレージの追加を行います。セカンダリストレージとは、仮想サーバ作成に使用するテンプレートやISOイメージを保存するための領域です。
- サーバー
- 192.168.24.110
- パス
- /export/secondary
以上で入力は完了です。【起動】ボタンを押すことで、初期セットアップが行われ、CloudStackが起動します。
初期セットアップのトラブルシューティング
【起動】ボタンを押すと初期セットアップが行われますが、うまく動作しないことがあります。例えば、
Creating system VMs (this may take a while)
から先に進まなくなってしまうといった状態です。
このような状態になった場合、ホストにログインし、/var/log/cloud/agent/agent.log を参照してください。
libvir: Storage error : Storage pool not found: no pool with matching uuid
libvir: Storage error : Storage pool not found: no pool with matching uuid
libvir: QEMU error : Unable to create cgroup for v-2-VM: No such file or directory
libvir: Storage error : ストレージプールが見つかりません: 一致する uuid のプールはありません
libvir: Storage error : ストレージプールが見つかりません: 一致する uuid のプールはありません
libvir: QEMU error : Unable to create cgroup for v-2-VM: そのようなファイルやディレクトリはありません
のようなエラーが見られる場合、libvirtd の再起動を行い、続いて cloud-agent の再起動を行ってください。
[root@cs-host ~]# /etc/init.d/libvirtd stop
libvirtd デーモンを停止中:                                 [  OK  ]
[root@cs-host ~]# /etc/init.d/libvirtd start
libvirtd デーモンを起動中:                                 [  OK  ]
[root@cs-host ~]# /etc/init.d/cloud-agent stop
Stopping Cloud Agent:                                      [  OK  ]
[root@cs-host ~]# /etc/init.d/cloud-agent start
Starting Cloud Agent:                                      [  OK  ]
[root@cs-host ~]#
これにより、しばらく待つことで Creating system VMs (this may take a while) から先に進むようになるはずです。
その後、CloudStackのUIが表示されますが、「インフラストラクチャ」「システムVM」を確認してください。「Console Proxy VM」と「Secondary Storage VM」が「Running」にならないようであれば、正常に動作していない可能性があります。
このような状態になった場合、ホストにログインし、virsh list --allを実行してください。
[root@cs-host ~]# virsh list --all
 Id 名前               状態
----------------------------------
  3 v-2-VM               実行中
  4 s-4-VM               実行中

[root@cs-host ~]#
このように、2つのVMが「実行中」であるにも関わらず、CloudStackのUIで「Running」になっていないのであれば、まずcloud-agentを停止します。
[root@cs-host ~]# /etc/init.d/cloud-agent stop
Stopping Cloud Agent:                                      [  OK  ]
[root@cs-host ~]#
次に、両VMを停止します。
[root@cs-host ~]# virsh shutdown 3
ドメイン 3 をシャットダウンしています

[root@cs-host ~]# virsh shutdown 4
ドメイン 4 をシャットダウンしています

[root@cs-host ~]#
[root@cs-host ~]# virsh list --all
 Id 名前               状態
----------------------------------
  - s-4-VM               シャットオフ
  - v-2-VM               シャットオフ

[root@cs-host ~]#
libvirtdを再起動します。
[root@cs-host ~]# /etc/init.d/libvirtd stop
libvirtd デーモンを停止中:                                 [  OK  ]
[root@cs-host ~]# /etc/init.d/libvirtd start
libvirtd デーモンを起動中:                                 [  OK  ]
[root@cs-host ~]#
cloud-agentを起動します。
[root@cs-host ~]# /etc/init.d/cloud-agent start
Starting Cloud Agent:                                      [  OK  ]
[root@cs-host ~]#
このまましばらくすると、両VMは自動的に起動してきます。
[root@cs-host ~]# virsh list --all
 Id 名前               状態
----------------------------------
  1 v-2-VM               実行中
  2 s-4-VM               実行中

[root@cs-host ~]#
CloudStackのUIからも「Console Proxy VM」と「Secondary Storage VM」が「Running」になったことが確認できるはずです。


